Bathroom Faucet Without Stopper

Bathroom Faucet Without Stopper

Quickly install a bathroom faucet by following this expert do-it-yourself advice, illustrated with step-by-step photos.

A split-set bathroom sink with a stone countertop on top of a bathroom cabinet.
A split-set bathroom faucet is relatively easy to install, especially if you're starting from scratch with a new cabinet and countertop.

The difficulty of installing a bathroom faucet depends partly on the type of faucet, but mostly on your access to the underside of the sink and the plumbing setup.

Installing a faucet is easiest during new construction, when you're installing the cabinetry, sink, and countertop, because you can usually do most of the assembly before installing the sink.

In situations where you'll be installing a faucet on an existing sink, access is trickier because it can be awkward working underneath the sink, inside the cabinet.

One tool that sometimes makes the job easier is a basin wrench—it allows you to reach up and tighten fittings behind the sink bowl.

A basin wrench on white background
Basin wrench eases installation of most faucets. Check price on Amazon

To make the assembly steps more understandable, in this article we show how to assemble the faucet on a new sink, working above the countertop.

When buying a faucet, be sure to get one that will fit the configuration of holes in your sink or countertop (or buy a sink that will fit the faucet you want). The number and configuration of holes for a single-piece faucet are different than those required for a split-set faucet like the one shown here.

If you're replacing an old faucet, you'll need to begin by removing it. Turn off the shut-off valves that serve the faucet's supply tubes. Use a wrench to remove the supply tubes' nuts from the faucet tailpieces. Place a bucket below the supply tubes—they'll be filled with water, which you'll need to drain into the bucket.

Use a basin wrench to remove the locknuts and the washers on both tailpieces.

If the sink has a pop-up assembly, disconnect it from the faucet and disassemble it to get it out of the way.

Then just lift out the faucet.

If the water supply tubes are old and corroded, this is a good time to replace them.

How to Install a Bathroom Faucet: Step-by-Step

Unpack your new faucet and make sure you have all of the necessary parts. If any pre-assembly is required, do that now, according to the manufacturer's directions. To make assembly of the new faucet easier, work with the countertop upside down on top of the vanity, as shown. If the countertop is considerably larger than our example, prop it upside down on the floor.

1 Clean the top surface of the countertop where the new faucet will sit. Fit the rubber gaskets (if the faucet and valves have them) onto the faucet's components, and then push the faucet's tailpiece up through its mounting hole in the sink or counter. Thread the washer and mounting nut onto the tailpiece. Then drop the valve assemblies into their holes and tighten them in place.

Man installing the faucet body and valve components of a bathroom sink.
Assemble the faucet body and valve components—ideally, working with the countertop turned upside-down.

Note the rubber gaskets in the photo: These are meant to create a watertight seal between the faucet body and valves and the counter or sink so that water spilled or sprayed on the counter doesn't leak down into the cabinet. If your faucet doesn't have these rubber gaskets, seal the perimeter of the base with plumber's putty before you insert the parts through the sink or countertop holes.

2 Connect the valves to the spout if you're installing a split-set faucet like this one. Wrap the threaded ends of the valves and connecting piece with a couple of turns of pipe-wrap tape, and then screw the parts together. Snug them until tight by hand, and then finish tightening them with an adjustable wrench.

Man connecting the faucet valves to the faucet body, using flexible tubing.
Connect the faucet valves to the faucet body, using flexible tubing.

3 Install the drain pop-up. Assuming that your faucet includes a drain pop-up that allows you to lift the drain stopper with a sink-top lever (most do), the next step is to assemble this.

Because the pop-up mechanism is integral to the sink drain tailpiece, this involves, removing the existing drain tailpiece and then installing the new tailpiece as shown.

The spring clip is positioned at the end of the pivot rod—this grips onto the lift rod. For more about pop-ups, please see How to Fix a Pop-Up Drain Stopper.

4 Push the lift rod into the hole in the spout, and then attach it to the pivot rod, using the extension rod and spring clip. If necessary, adjust it so the drain stopper will open and close properly.

Man installing the drain and pop-up assembly, and connecting the pop-up to the lift rod.
Install the drain and pop-up assembly, and connect the pop-up to the lift rod.

5 Connect the flexible water-supply tubes to the tailpieces. Screw them on, turning the knurled nuts clockwise.  Tighten the nuts with a wrench.

6 Place the assembled countertop and faucet right-side up on the vanity or cabinet.

Then connect the faucet's hot and cold water supply tubes to the shutoff valves at the wall, gently bending the flexible supply tubes as required. Turn the compression nuts or flared fittings clockwise until finger-tight, and then snug them tighter with a wrench.

Turn on the water at the shut-off valves by turning the valve handle counterclockwise. Then turn on the faucet to flush the faucet and line of any debris.

Man turning off water to sinks and toilets at the small valve beneath them.
Turn the water supply valves counterclockwise to get the water flowing. LightWaveMedia / Shutterstock.com

Last, check for leaks from the faucet or supply tubes.

Bathroom Faucet Without Stopper

Source: https://www.hometips.com/diy-how-to/bathroom-faucet-installation.html

Share:

Glass Bathroom Sink

Glass Bathroom Sink

Bowl-shaped plumbing fixture

A sink – also known by other names including sinker, washbowl, hand basin, wash basin, and simply basin – is a bowl-shaped plumbing fixture used for washing hands, dishwashing, and other purposes. Sinks have taps (faucets) that supply hot and cold water and may include a spray feature to be used for faster rinsing. They also include a drain to remove used water; this drain may itself include a strainer and/or shut-off device and an overflow-prevention device. Sinks may also have an integrated soap dispenser. Many sinks, especially in kitchens, are installed adjacent to or inside a counter.

When a sink becomes clogged, a person will often resort to using a chemical drain cleaner or a plunger, though most professional plumbers will remove the clog with a drain auger (often called a "plumber's snake").

History [edit]

United States [edit]

The washstand was a bathroom sink made in the United States in the late 18th century.[1] The washstands were small tables on which were placed a pitcher and a deep bowl, following the English tradition. Sometimes the table had a hole where the large bowl rested, which led to the making of dry sinks. From about 1820 to 1900, the dry sink evolved by the addition of a wooden cabinet with a trough built on the top, lined with zinc or lead.[1] This is where the bowls or buckets for water were kept. Splashboards were sometimes added to the back wall, as well as shelves and drawers, the more elaborate designs usually placed in the kitchen.

Materials [edit]

Sinks are made of many different materials. These include:

  • Ceramic
  • Concrete
  • Copper
  • Enamel over steel or cast iron
  • Glass
  • Granite
  • Marble
  • Nickel
  • Plastic
  • Polyester
  • Porcelain
  • Resin washbasin
  • Soapstone
  • Stainless steel
  • Stone
  • Terrazzo
  • Wood

Stainless steel is commonly used in kitchens and commercial applications because it represents a good trade-off between cost, usability, durability, and ease of cleaning.[2] Most stainless steel sinks are made by drawing a sheet of stainless steel over a die. Some very deep sinks are fabricated by welding. Stainless steel sinks will not be damaged by hot or cold objects and resist damage from impacts. One disadvantage of stainless steel is that, being made of thin metal, they tend to be noisier than most other sink materials, although better sinks apply a heavy coating of vibration-damping material to the underside of the sink.[3]

Enamel over cast iron is a popular material for kitchen and bathroom sinks. Heavy and durable, these sinks can also be manufactured in a very wide range of shapes and colors. Like stainless steel, they are very resistant to hot or cold objects, but they can be damaged by sharp impacts and once the glass surface is breached, the underlying cast iron will often corrode, spalling off more of the glass. Aggressive cleaning will dull the surface, leading to more dirt accumulation. Enamel over steel is a similar-appearing but far less rugged and less cost-effective alternative.

Double sink with a marble countertop

Solid ceramic sinks have many of the same characteristics as enamel over cast iron, but without the risk of surface damage leading to corrosion.

Plastic sinks come in several basic forms:

  • Inexpensive sinks are simply made using injection-molded thermoplastics. These are often deep, free-standing sinks used in laundry rooms. Subject to damage by hot or sharp objects, the principal virtue of these sinks is their low cost.
  • High-end acrylic drop-in (lowered into the countertop) and undermount (attached from the bottom) sinks are becoming more popular, although they tend to be easily damaged by hard objects – like scouring a cast iron frying pan in the sink.
  • Plastic sinks may also be made from the same materials used to form "solid surface" countertops. These sinks are durable, attractive, and can often be molded with an integrated countertop or joined to a separate countertop in a seamless fashion, leading to no sink-to-countertop joint or a very smooth sink-to-countertop joint that can not trap dirt or germs. These sinks are subject to damage by hot objects but damaged areas can sometimes be sanded down to expose undamaged material.

Soapstone sinks were once common, but today tend to be used only in very-high-end applications or applications that must resist caustic chemicals that would damage more-conventional sinks.

Wood sinks are from the early days of sinks, and baths were made from natural teak with no additional finishing. Teak is chosen because of its natural waterproofing properties – it has been used for hundreds of years in the marine industry for this reason. Teak also has natural antiseptic properties, which is a bonus for its use in baths and sinks.

Glass sinks: A current trend in bathroom design is the handmade glass sink (often referred to as a vessel sink), which has become fashionable for wealthy homeowners.

Stone sinks have been used for ages. Some of the more popular stones used are: marble, travertine, onyx, granite, and soap stone on high end sinks.

Glass, concrete, and terrazzo sinks are usually designed for their aesthetic appeal and can be obtained in a wide variety of unusual shapes and colors such as floral shapes. Concrete and terrazzo are occasionally also used in very-heavy-duty applications such as janitorial sinks.

Styles [edit]

Sinks are available in many colors

Top-mount sinks [edit]

Self-rimming (top-mount) sinks sit in appropriately shaped holes roughly cut in the countertop (or substrate material) using a jigsaw or other cutter appropriate to the material at hand. They are suspended by their rim which forms a fairly close seal with the top surface of the worktop. If necessary, this seal can be enhanced by clamping the sink from below the worktop.

Bottom-mount sinks [edit]

Bottom-mount or under-mount sinks are installed below the countertop surface. The edge of the countertop material is exposed at the hole created for the sink (and so must be a carefully finished edge rather than a rough cut). The sink is then clamped to the bottom of the material from below. Especially for bottom-mount sinks, silicone-based sealants are usually used to assure a waterproof joint between the sink and the countertop material. Advantages of an undermount sink include superior ergonomics and a contemporary look; disadvantages include extra cost in both the sink and the counter top. Also, no matter how carefully the cut out is made, the result is either a small ledge or overhang at the interface with the sink. This can create an environment for catching dirt and allowing germs to grow.

Solid-surface plastic materials allow sinks to be made of the same plastic material as the countertop. These sinks can then easily be glued to the underside of the countertop material and the joint sanded flat, creating the usual invisible joint and completely eliminating any dirt-catching seam between the sink and the countertop. In a similar fashion, for stainless steel, a sink may be welded into the countertop; the joint is then ground to create a finished, concealed appearance.

Butler's sink [edit]

A butler's sink is a rectangular ceramic sink with a rounded rim which is set into a work surface.[4] There are generally two kinds of butler's sinks: the London sink and the Belfast sink.[4] In 2006, both types of sinks usually were 61 centimetres (24 in) across and 46 centimetres (18 in) front-to-back, with a depth of 22.5 centimetres (8.9 in).[5] London sinks were originally shallower than Belfast sinks.[4] (One plumbing guide in 1921 suggested that the Belfast sink was 38 centimetres (15 in) deep.)[6] Some believe this was because London had less access to fresh water (and thus a greater need to conserve water), but this theory is now contested. It is more likely the two sinks had different roles within the household.[ citation needed ] But that difference usually does not exist in the modern era, and both sinks are now shallow.[4] The primary difference both in the past and today between a Belfast and London sink is that the Belfast sink is fitted with an overflow weir which prevented water from spilling over the sink's edge by draining it away and down into the wastewater plumbing.[7]

Farmer's sink [edit]

A farmer's sink is a deep sink that has a finished front. Set onto a countertop, the finished front of the sink remains exposed. This style of sink requires very little "reach-over" to access the sink.

Vessel sink [edit]

A vessel sink is a free-standing sink, generally finished and decorated on all sides, that sits directly on the surface of the furniture on which it is mounted. These sinks have become increasingly popular with bathroom designers because of the large range of materials, styles, and finishes that can be shown to good advantage.

Food catering sinks [edit]

Catering sinks are often made in sizes compatible with standard size Gastronorm containers, a European standard for food containers.

Ceramic basin construction [edit]

Pottery is made by a blend of clays, fillers and fluxes being fused together during the firing process. There are high fire clays and glazes which are heated to over 1200 °C (2200 °F) and are extremely resistant to fading, staining, burning, scratching and acid attack. Low fire clays, fired below 1200 °C, most often used by large commercial manufacturers and third world producers, while durable, are susceptible to scratching and wear over time. The clay body is first bisqued to about 1000 °C (1900 °F). In the second firing a white or coloured glaze is applied and is melted by heat which chemically and physically fuses the glass (glaze) to the clay body during the same firing process. Due to the firing process and natural clays used, it is normal for the product to vary in size and shape, and +/− 5 mm is normal.

Accessories [edit]

Some public restrooms feature automatic faucets, which use a motion-sensing valve to detect the user's hands moving beneath the tap and turn the water on. Some kitchen sinks also come equipped with a sink sprayer.

Sinks, especially those made of stainless steel, can be fitted with an integrated drainboard, allowing for the draining of washed dishes.

Gallery [edit]

There are many different shapes and sizes of sinks.

  • White glass basins

  • A number of people can use this sink at the same time

  • Wood sink in an art school

  • Sink designed for dish washing

  • A sink with an offset drain

See also [edit]

  • Dipper well
  • Domestic water system
  • Floor plan
  • Garbage disposal
  • Lavabo
  • Proverbial kitchen sink
  • Trap (plumbing)

References [edit]

  1. ^ a b Sinks. The Old-House Journal; August 1986, Vol. 14, No. 6: pp. 270–77. Published by Active Interest Media, Inc. ISSN 0094-0178
  2. ^ M. Sadler, Michael (11 September 2010). "Usage of Stainless Steel Kitchen Sink". www.nivito.com . Retrieved 28 February 2015.
  3. ^ Julie, Taylor (15 February 2008). "הלבשת אמבטיה". www.bath.co.il . Retrieved 14 June 2016.
  4. ^ a b c d Blower, 2006, p. 232.
  5. ^ Blower, 2006, p. 232-233.
  6. ^ Fletcher, 1921, p. 96.
  7. ^ Blower, 2006, p. 233.

Bibliography [edit]

  • Blower, G. J. (2006). Plumbing: mechanical services (5th ed.). Harlow: Prentice Hall. ISBN0131976214.
  • Fletcher, Banister Flight, Sir. Architectural Hygiene. London: Sir I. Pitman & Sons, 1921.

External links [edit]

Glass Bathroom Sink

Source: https://en.wikipedia.org/wiki/Sink

Share:

Bathroom Vanity And Cabinet Set

Bathroom Vanity And Cabinet Set

DIY is such a rewarding hobby, and much of the time, it can also save you a lot of money since you can build something yourself for much less than it would cost to buy it from a store.

For anyone who wants to build a bathroom vanity, we've scoured the internet to see what other people have been doing – and as a result, here are our favorite 27 homemade bathroom vanity plans you can DIY easily.

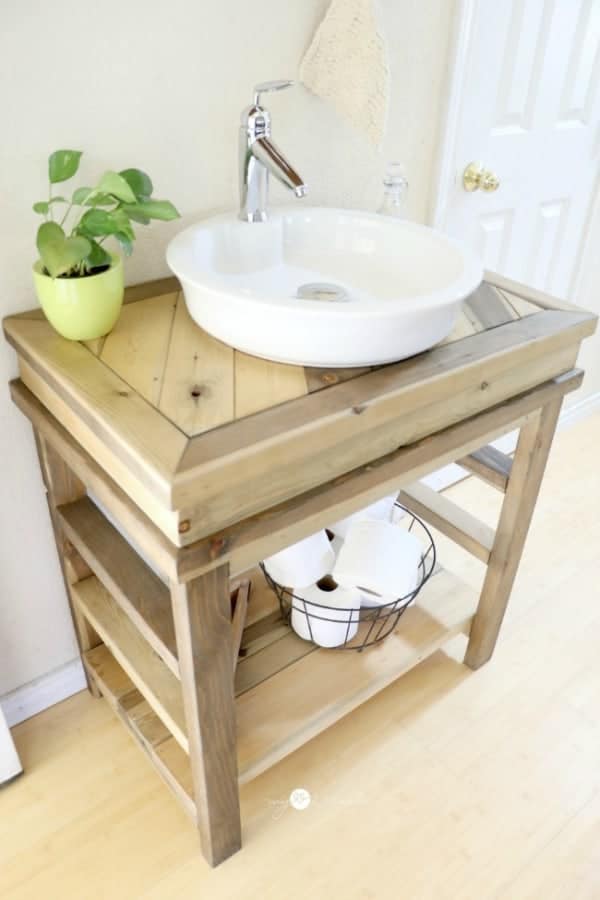
1. DIY Bathroom Vanity from Shanyt2Chic

DIY Bathroom Vanity from Shanyt2Chic

Here's a site we like a lot because their projects match our idea of what DIY should really be – where you take stuff you might already have at home or items that don't cost a lot to buy and turn them into something useful and attractive. That's just what they do here, and with this plan, you'll learn how to make a simple bathroom vanity that won't cost you a fortune. A great place to start if you're looking for ideas and inspiration.

Click for more details

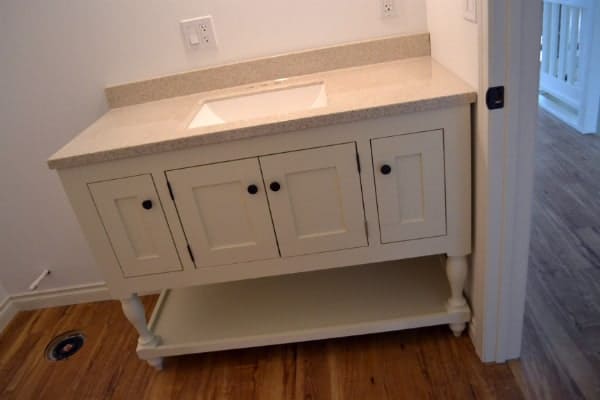
2. How to Build a DIY Bathroom Vanity from Scratch

How to Build a DIY Bathroom Vanity from Scratch

This is another site we enjoy visiting for DIY plans, and here, blogger Serena shows you how to make a bathroom vanity from scratch. We love the tone and the humor of this blog, and the instructions are also clear and easy to follow. There are some useful photos to show you what you should be doing at each step along with a picture of the final result – and it's stunning!

Click for more details

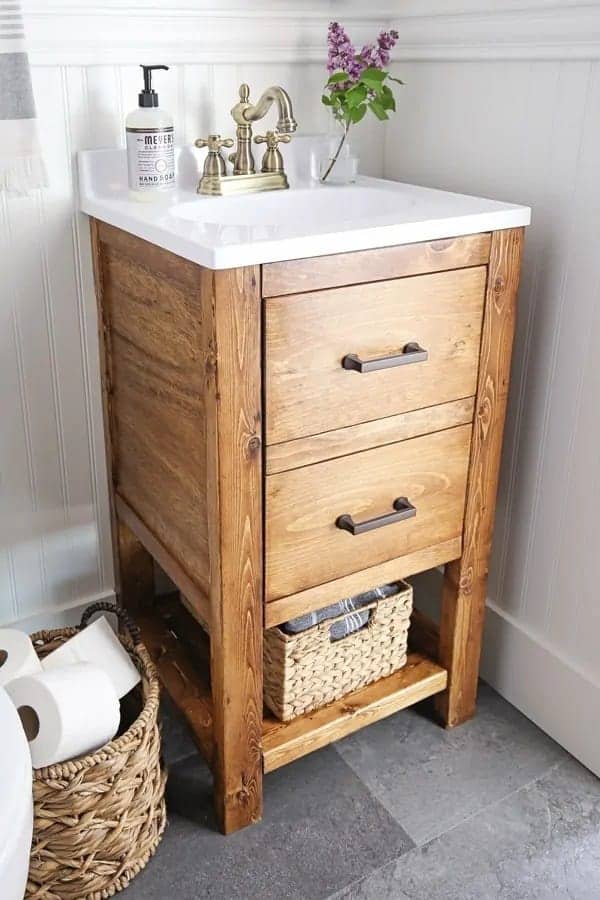
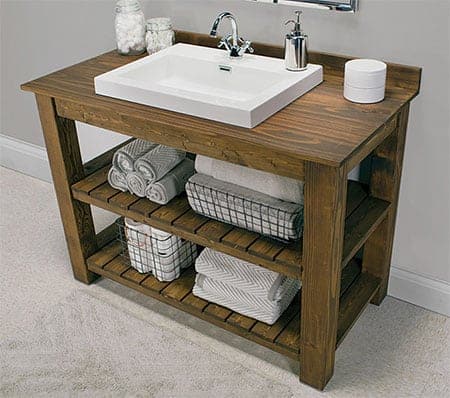
3. DIY Reclaimed Lumber Bath Vanity

If you want to build a rustic-style vanity without having to spend loads of money on the project, this video is one you need to watch. In it, this YouTuber shows you how he made a DIY vanity using reclaimed lumber. As he explains, he is not a professional woodworker, just a keen hobbyist. But if he can produce results like this, then so can you. And that should be a thought that inspires you to give it a go.

Click for more details

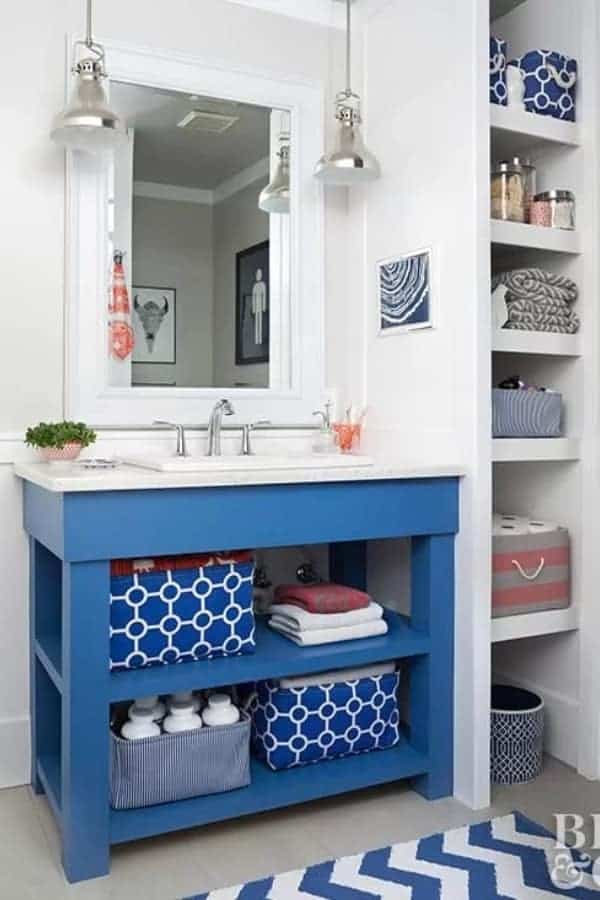
4. DIY Bathroom Vanity for $65

DIY Bathroom Vanity for $65

Even if you want to save yourself money by building your own vanity instead of buying one from a store, it's unreasonable to expect it to cost nothing – however, if you compare a mere $65 with what you would have to pay for a ready-made one, this is a plan that is still extremely budget-friendly. Interested in finding out how? Then go check it out!

Click for more details

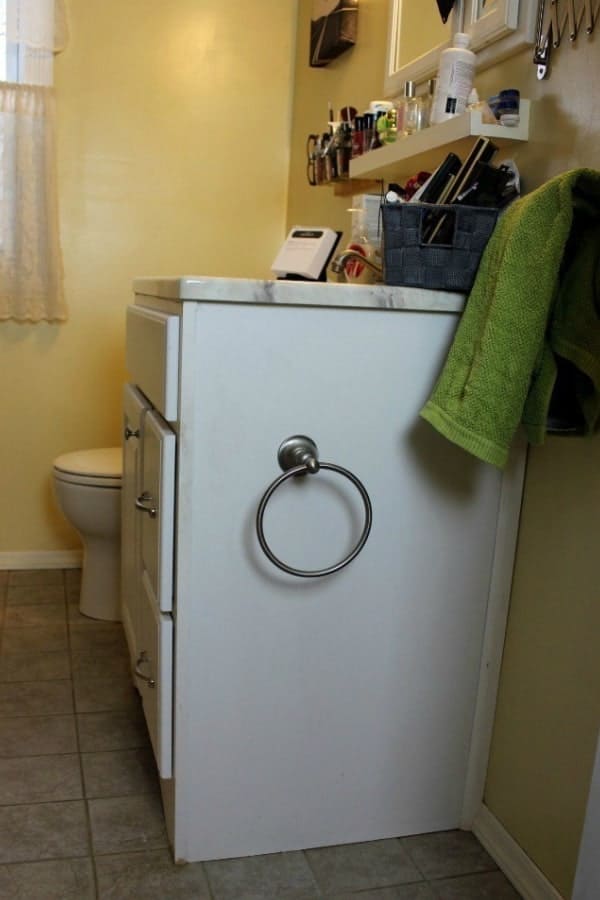
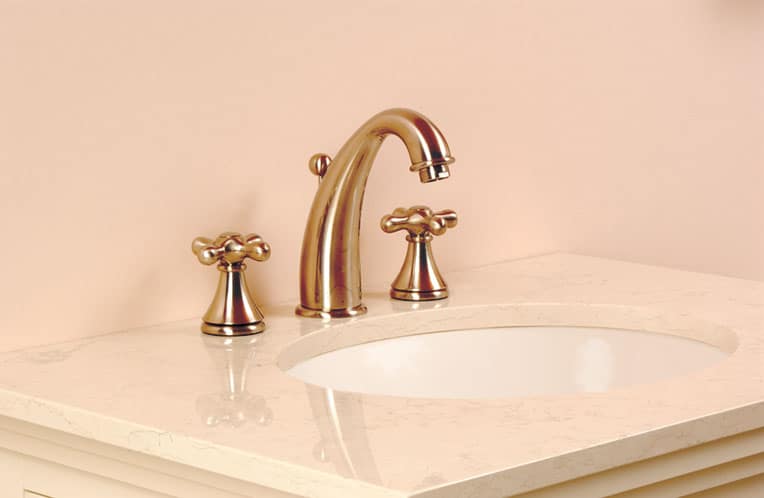
5. How to Make a Dresser into a Vanity

How to Make a Dresser into a Vanity

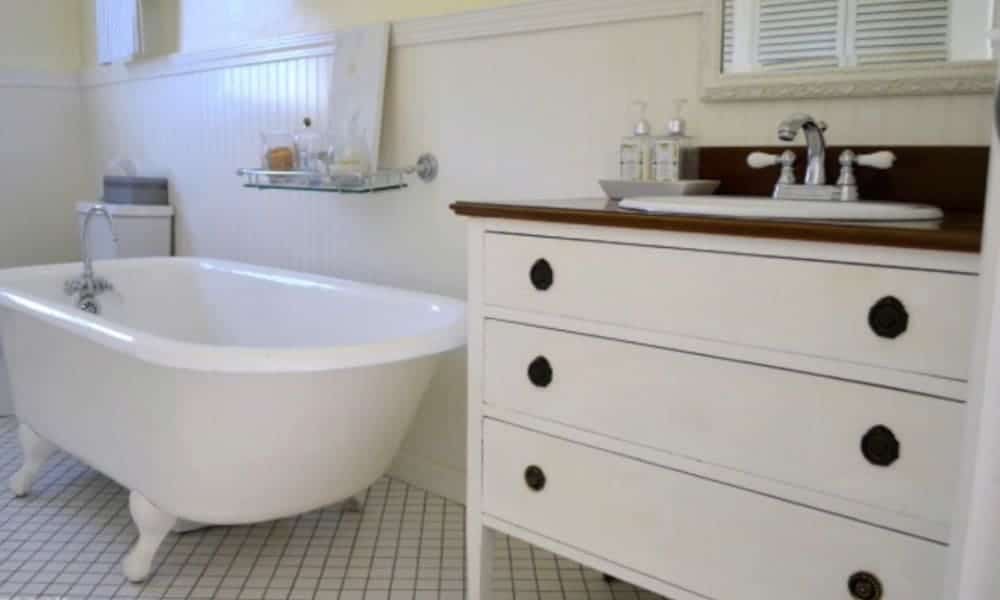
If you want a new vanity, you don't have to build it from nothing. You can also convert another piece of furniture to save you some time, and if you want to know how to make a vanity from an old dresser, this is a plan that explains how. As you can see, even if you have an ugly, old-fashioned dresser, you can still turn it into a beautiful modern bathroom vanity. And that's much better than just throwing it out!

Click for more details

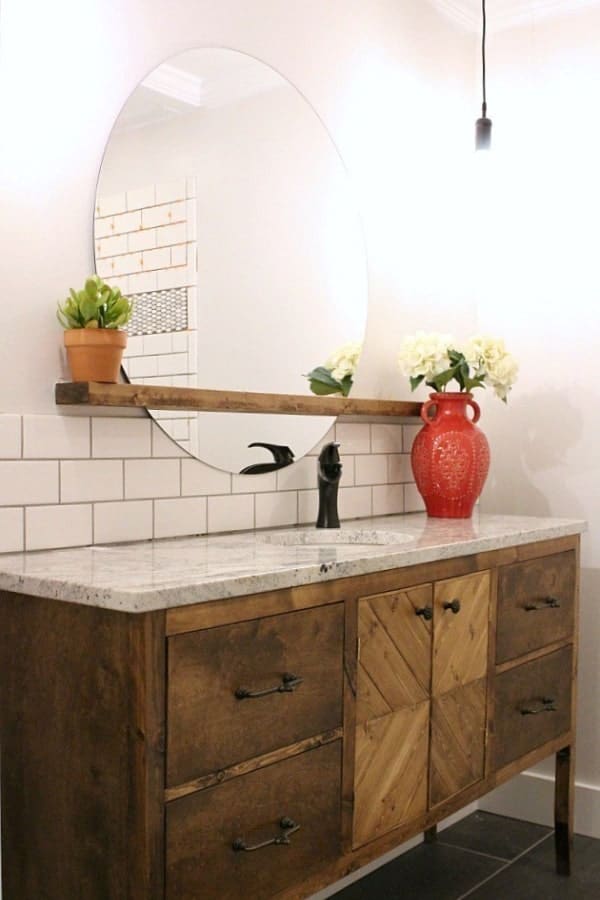
6. DIY Bathroom Vanity (48")

With this plan, you'll need to invest a little more at the beginning – the DIYer expects this will cost you around $200 to build. However, when compared to some of the vanities you might see in a showroom, that's still a reasonable price. And as you'll see, this large bathroom vanity is gorgeous, so we think it's well worth spending the cash.

7. Ikea Hack: How to Build a Small DIY Bathroom Vanity

Ikea Hack How to Build a Small DIY Bathroom Vanity

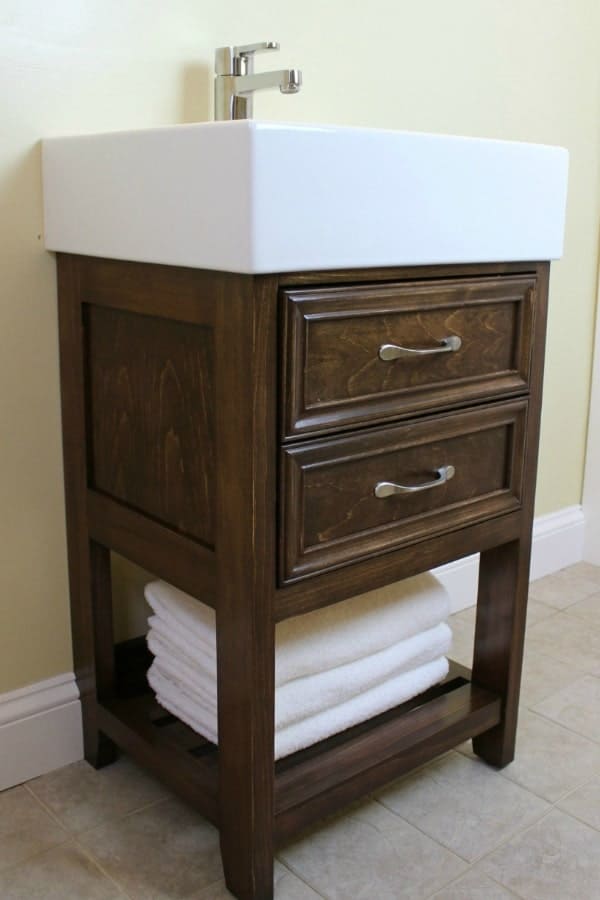
If you have a look online nowadays, there are quite a few Ikea hacks out there, guides to converting worn out Ikea furniture into something new and functional. That way, you can give old objects a second life while saving yourself some money buying new furniture. And of course, there's the sense of achievement you get from completing a rewarding DIY project. This is a hack for building a small bathroom vanity, and if that's what you need, this is a plan that's well worth a look.

Click for more details

8. DIY Bathroom Vanity with Bottom Drawers

DIY Bathroom Vanity with Bottom Drawers

Here we have another DIY bathroom vanity project that is designed to save you money. As this blogger explains, refitting a bathroom can be extremely expensive, and not everyone has the budget for a complete makeover, However, if you follow this plan, you can build the vanity for less, leaving you a bit of extra cash to spend on other aspects of your redesign.

Click for more details

9. DIY Traditional Vanity Cabinet Build

For anyone looking for a plan that shows you how to remodel a whole bathroom, this video is worth checking out. This part is about how they made the vanity, but if you like their work, you can also check out the other videos on their channel that show the rest of the project. Another recommended watch.

10. Small Size, Big Style DIY Bathroom Vanity

Small Size, Big Style DIY Bathroom Vanity

Just the title of this project makes it sound like something many people will be interested in trying. So many of us don't have the big bathroom of our dreams, and we have to make the most of limited space. If that sounds like something you can relate to and you want to build a beautiful vanity for a smaller bathroom, this could be the plan for you.

Click for more details

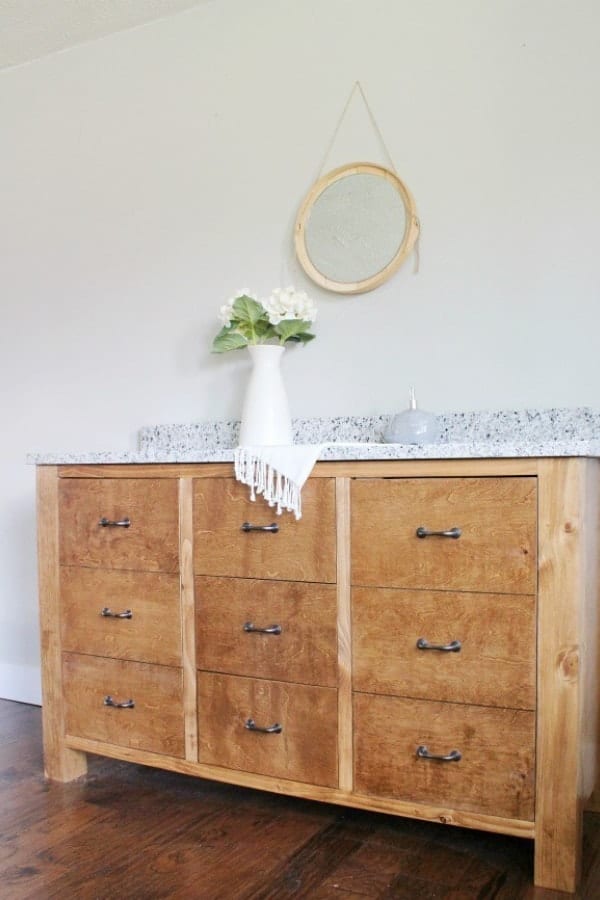
11. DIY Make a Wood Bathroom Vanity

DIY Make a Wood Bathroom Vanity

The first thing that stands out on this page is the photo of the vanity you're going to build. If you didn't know it was a DIY effort, you would never guess – it looks so professional. Some DIY projects look so…well, so DIY, but not this one. So if you want a high-quality addition to your bathroom that you can build with your own two hands, this plan is for you.

Click for more details

12. How to Make a Wall-Mounted Bathroom Vanity

This is a video that shows you how to build a wall-mounted vanity. Again, not everyone has as much space as they'd like, and if you need something compact that will help you make the most of a smaller bathroom, this DIYer will give you some ideas on how to do it.

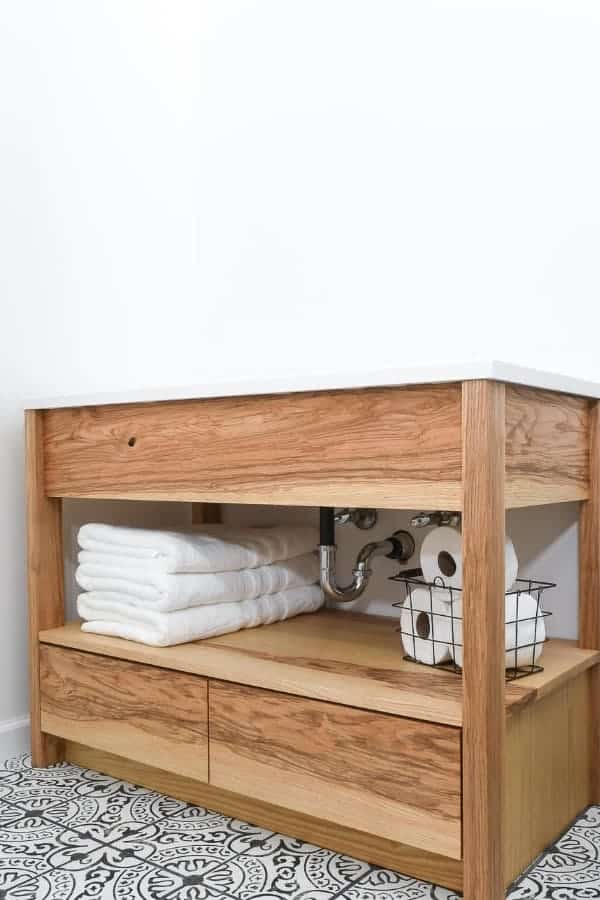
13. Make a Floating Bathroom Vanity

Make a Floating Bathroom Vanity

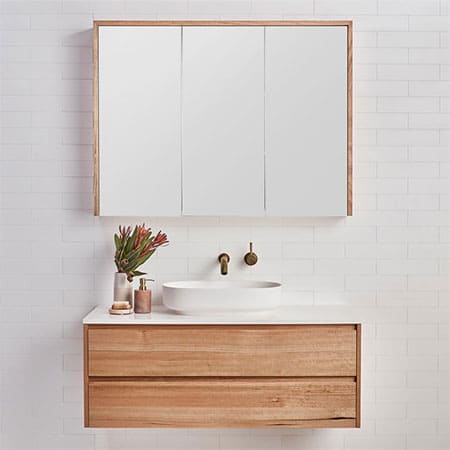
If you liked the classy vanity in #11, you should also check this plan out because it's written by the same people. Again, it looks totally pro, and visitors would never believe you'd build it yourself. This time it's a floating vanity, which is ideal when space is at a premium. If that sounds like your home, this is an idea you need to see.

Click for more details

14. How to Build a DIY Modern Floating Vanity or TV Console – by Shara

How to Build a DIY Modern Floating Vanity or TV Console – by Shara 1

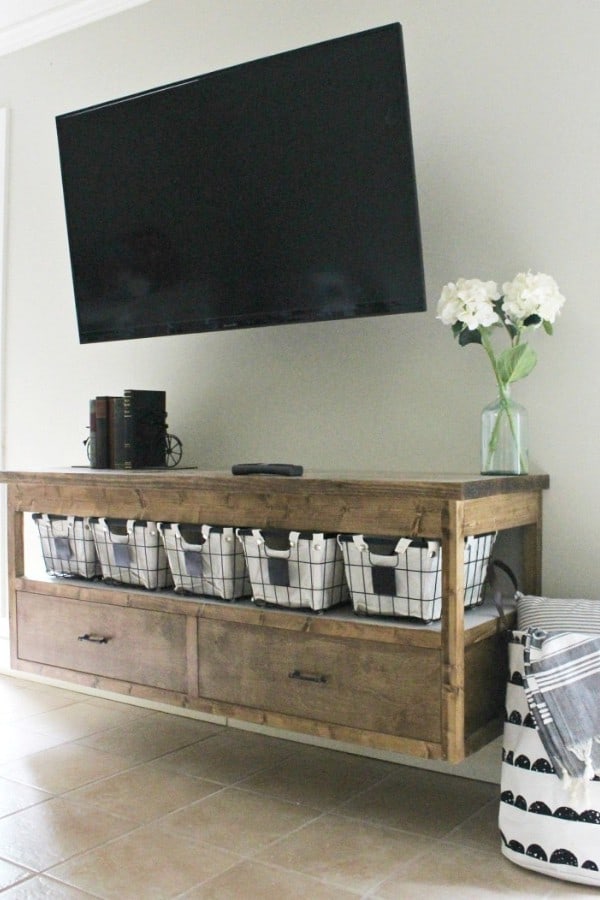
This is a versatile plan that can be adapted to make either a floating bathroom vanity or a place to put your TV. Since it's a more general plan, you might need to adapt it a little – but it's definitely one that should give you a few ideas about the kind of thing that's possible.

Click for more details

15. DIY Bathroom Vanity

Let's start by saying we think this video is a bit of a cheat since – as he admits right at the beginning – he didn't DIY it at all; he had his contractor build it for him. That aside, the vanity he had built is stunning, and this is a video that should be a source of inspiration at the very least.

16. DIY Bathroom Vanity – by Shara

DIY Bathroom Vanity – by Shara

Here's another plan by Shara. In fact, we've included three of her plans – check out #17 below, too – but that's because she's a talented DIYer with lots of great ideas, so why not? The vanity she builds here is a large rustic-style model that we love – and if that's the look you like, this is a plan you might enjoy.

Click for more details

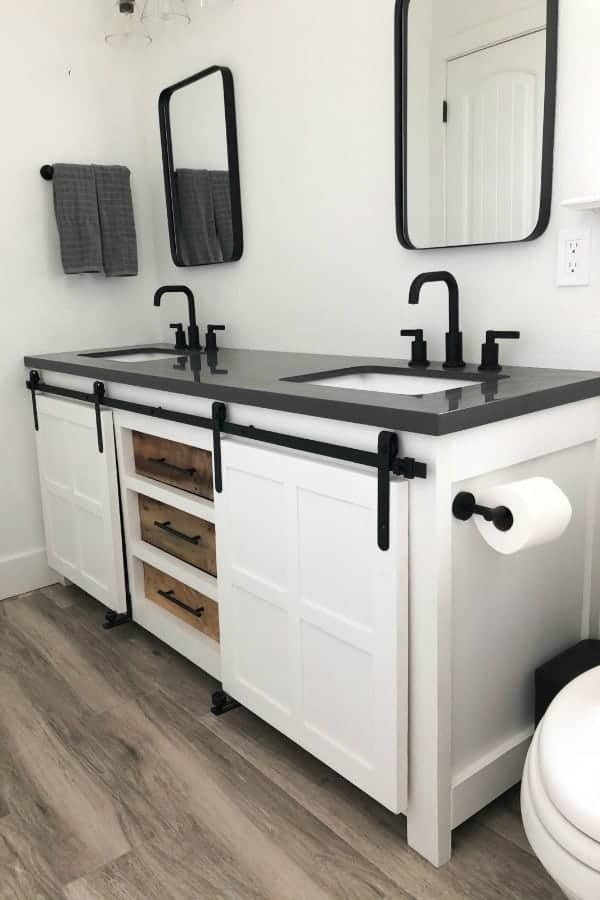
17. Faux Drawer DIY Double Bathroom Vanity – also by Shara

Faux Drawer DIY Double Bathroom Vanity – also by Shara

Shara's third plan in our list shows you how to build a double bathroom vanity with faux drawers. It looks fantastic, and as with her other plans, there are good instructions and plenty of photos to show you what you're supposed to be doing. Great job Shara, we're fans!

Click for more details

18. How to build a Small Bathroom Vanity DIY

This is a fun video that shows you how to build a small bathroom vanity from rustic hickory, an especially attractive wood to work with. As he explains, this is not a complicated project, making it a good option for anyone who doesn't necessarily have the most advanced DIY skills. This means even DIY novices will be able to finish the job in only a day or two. Want to try? Then give it a watch!

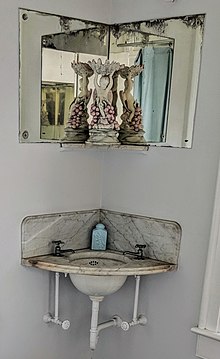
19. Vintage Dresser to Bathroom Vanity

Vintage Dresser to Bathroom Vanity

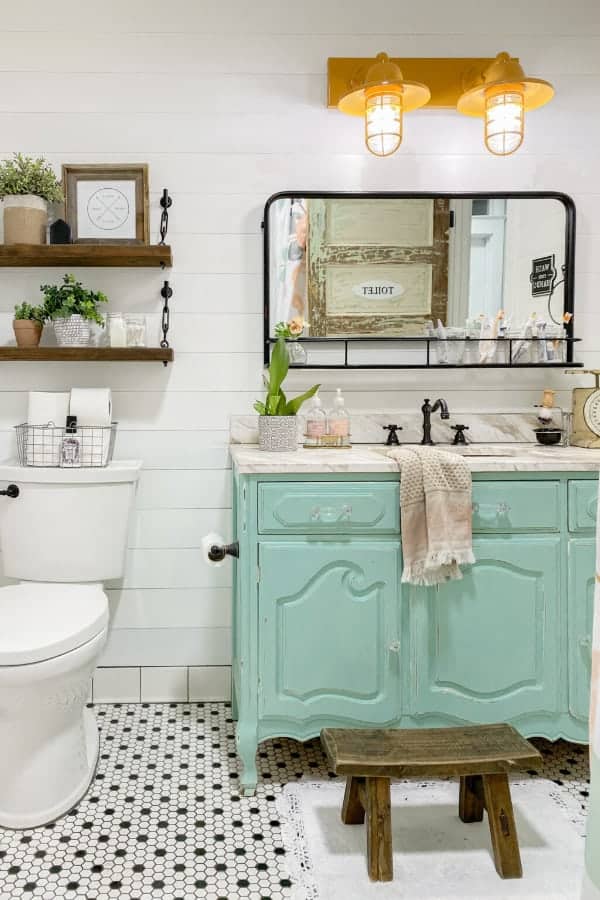
The vanity in this plan is one of our favorites. We love the vintage style, and the color scheme in the bathroom is adorable. This is another plan for a conversion, so if you want to make good use of an old, worn-out dresser, this plan will show you what to do.

Click for more details

20. How to build a bathroom vanity

We're not quite sure what to make of this since the choice of music seems a bit…unconventional. However, we always love watching these time-lapse videos of people working on their DIY projects because it's so much fun to see everything start to take shape. Check it out and decide for yourself!

21. DIY Floating Bathroom Vanity

DIY Floating Bathroom Vanity

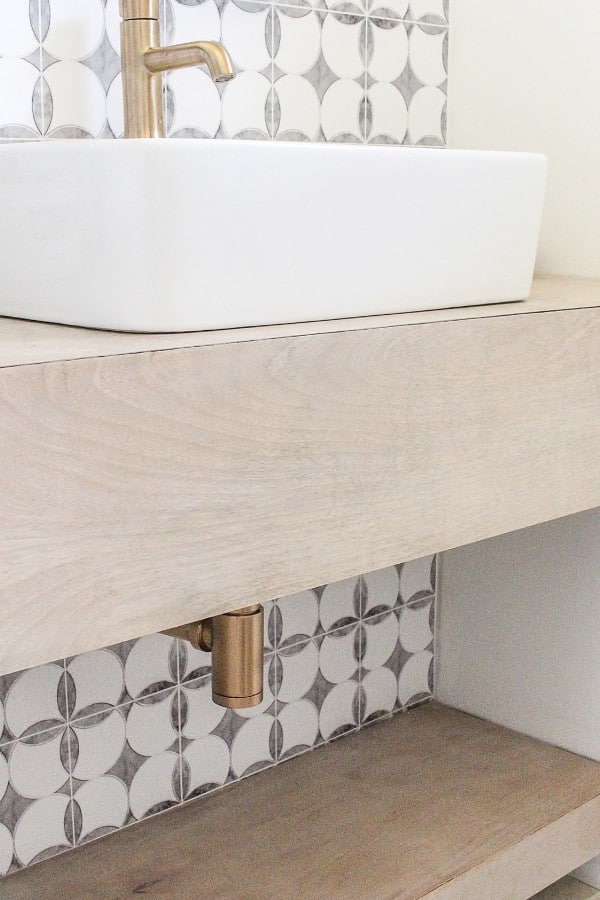
This is a simple plan for a floating vanity that's easy to follow and shouldn't cost you too much. You'll find a list of everything you need for the project along with clear instructions for what you need to do. The photos should give you plenty of inspiration, too.

Click for more details

22. Rimu Veneered floating vanity

Here's a video of a professional at work, so you might not have all the same tools as him at your disposal. However, we still think it's worth watching since you can pick up a lot of tips about improving your woodworking skills, and it should also give you a few ideas about the kinds of things you can achieve.

23. Small Bathroom Vanity

Small Bathroom Vanity

With this plan, you can make a small, uncomplicated vanity that will look great in your bathroom if you're short on space. There are plenty of explanations concerning the steps you should be following, and there are also lots of photos to show you what you need to do at each stage of the project.

Click for more details

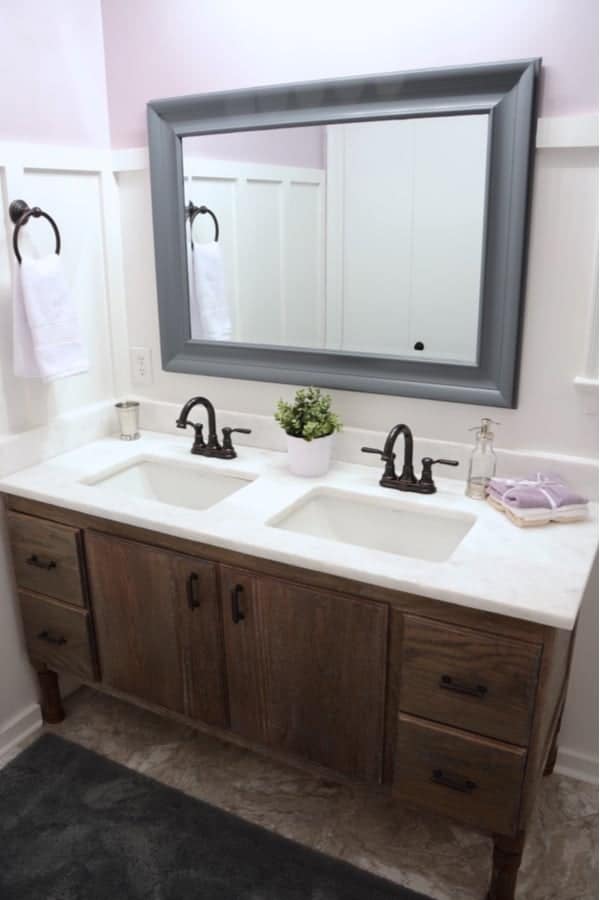
24. 48″ Turned Leg Vanity

48 Turned Leg Vanity

If you do have space, on the other hand, you can look at plans for larger bathroom vanities, and if you're fortunate enough to be in that position, this farmhouse-style option could be one that's worth considering. We especially like the clear photos and diagrams that show you exactly how to work out the measurements. A well-written plan that most people will find useful.

Click for more details

25. DIY Modern Bathroom Vanity

This is a simple video that is light on instructions but that rather just demonstrates what needs to be done. Again, the end result is highly professional, so if you want to have a go at something that will be sure to impress your guests, this could be another one that's worth trying.

26. How to Build a DIY Vanity for Less

How to Build a DIY Vanity for Less

There are lots of reasons why people build DIY furniture. Some enjoy the process while for others it's the satisfaction of the finished project – but for many, the fact that it allows you to save some money comes high on the list. If that's something you can relate to, this budget-friendly DIY vanity could be the kind of thing that will appeal.

Click for more details

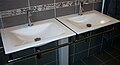
27. Building TWO Vanities for half the price of buying JUST ONE

In the final video we found, this YouTuber explains how he built these two vanities for a fraction of the price he would have paid buying jus one ready-made – and the quality is also way better than store-bought furniture. In fact, there are only advantages and no disadvantages, so why wouldn't you want to try?

So much inspiration to be found

We always love looking for DIY plans like this because the creativity and inventiveness on display never fail to inspire us to have a go ourselves.

We hope you've enjoyed these plans as much as we enjoyed finding them for you, and above all, we hope you've found the inspiration you need for your next DIY project.
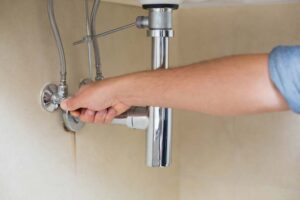
Bathroom Vanity And Cabinet Set

Source: https://www.sunrisespecialty.com/diy-bathroom-vanity

Share:

Small Loft Bathroom Ideas

Small Loft Bathroom Ideas

What Are Some Design Ideas for Small Bathrooms?

Photo Courtesy: NelleG/E+/Getty Images

Redecorating the rooms in your home can bring some chaos, but it also brings a lot of excitement as you watch an entirely new look come to life in rooms that had become mundane and dated. The long-term enjoyment and satisfaction you get from a newly redesigned bathroom, for example, is more than worth the short amount of time you spend completing the work.

When you're decorating a particularly small bathroom — or any small room — you have to make the most of every bit of available space. From creating practical spaces to letting your design imagination shine through, you could take your new bathroom in many different directions. Let's take a look at some great design ideas for small bathrooms.

Go Bold with Wallpaper

Wallpaper may seem like a dated idea, but many of today's modern prints and designs look nothing like those blocky, geometric designs from days gone by. Bold prints and striking patterns that might look overwhelming in a larger space can really shine in a small bathroom. Choose an accent wall and decorate it with bright colors or a punchy pattern or go dramatic and wallpaper the entire bathroom in a textured print.

Photo Courtesy: Tracy A. Woodward/The Washington Post/Getty Images

Keep Counter Lines Clean

If you have an ample budget, changing your bathroom counter can really change the entire feel of the bathroom. Choose a design that adds crisp, clean lines to the space. Decorative finishes and scalloped edges may seem fancy and tempting, but they can distract from the rest of the room and diminish your counter space. Additionally, patterned designs on the walls call for "non-busy" counters and accessories to avoid a cluttered feel.

Photo Courtesy: FluxFactory/E+/Getty Images

Add a Design Element to the Ceiling

If decorating the walls isn't your style or you don't have a lot of open wall space, consider adding an eye-catching design element to the ceiling instead. Drawing visitors' eyes up to the ceiling helps create the illusion that your overall bathroom space is much larger than it actually is, according to Elle Decor.

Photo Courtesy: David Papazian/Corbis/Getty Images

Consider a Floating Sink

Okay, so maybe floating sinks don't really float, but these types of pedestal sinks with no surrounding counters almost give the impression they are really suspended in midair. This sink style allows you to eliminate bulky counters and cabinets by skipping the traditional bathroom vanity. If counter space isn't important to you, look for a modern floating sink with minimal plumbing to keep your walls and floor tidy.

Photo Courtesy: John Lovette/Photographer's Choice RF/Getty Images

Think Outside the Shower Stall

Traditional shower stalls and bathtubs take up a lot of valuable space in a tiny bathroom. If you've got the budget for a full replacement, consider turning your standard bathroom into a European-style bathroom with an open shower and drain on one end of the room, partially separated by a transparent sheet of laminated glass.

Photo Courtesy: Onzeg/E+/Getty Images

Try Hanging a Towel Bar

If you plan on keeping the counter and you need more counter space, hang a towel bar (or two) to free up space. These bars can hold standard hand towels or even full-size body towels in most cases. This use of vertical storage space saves some of your limited square footage for other uses. As a bonus, you can find plenty of towel bars with decorative designs to spruce up your walls as well.

Photo Courtesy: Comstock Images/Stockbyte/Getty Images

Bring Some Natural Light In

One of the biggest problems in a small space is the lack of light, and dark rooms with poor lighting look not only dismal but also seem much smaller than they actually are. If your bathroom has a window, install decorative blinds or a window shade in a color and material that lets some natural light in, even when the blinds are closed or the shade is pulled down.

Photo Courtesy: Catherine Falls Commercial/Moment/Getty Images

Spring for an Oval Mirror

You know how funhouses always have halls and rooms with funky mirrors in them? The logic is simple — mirrors are great at creating optical illusions. Oval mirrors, in particular, create an illusion of height, and every mirror reflects both artificial and natural light to make rooms much brighter. Place an oval mirror over the sink or an open wall to add brightness and create the illusion of extra height in your small bathroom.

Photo Courtesy: tulcarion/E+/Getty Images

Use Ledges or Shelves for Storage

If you're completely remodeling your small bathroom, consider choosing a shower and tub enclosure with storage ledges in the walls. If your do-over isn't that extensive, you could hang shelves in the shower enclosure or above the sink. Ledges and shelves are great for storing shower and hair products that you don't want cluttering your counters.

Photo Courtesy: Image Source/Getty Images

Choose Flexible Storage Options

As much as you want to avoid clutter in a small bathroom, it's inevitable that you need certain items in the room. The storage items you choose are determined by the style choices you make throughout the room. If you opt for a pedestal sink, you might be able to slide a basket with fresh towels underneath it. If your shower doesn't have shelves, then look for a hanging shower caddy to drape over the shower head to hold your supplies. If you hang a shelf near your sink, pick up some cute containers to place on it to hold your toothbrush, toothpaste, hairbrush and other essentials.

Photo Courtesy: MIXA/Getty Images

More From QuestionsAnswered.net

Small Loft Bathroom Ideas

Source: https://www.questionsanswered.net/lifestyle/10-design-ideas-small-bathrooms?utm_content=params%3Ao%3D740012%26ad%3DdirN%26qo%3DserpIndex

Share:

Metal Bathroom Faucets

Metal Bathroom Faucets

My friends, I always have renovation on my mind, and my attention as turned to my master bathroom. The tile and cabinets are too traditional for my taste so I'm budgeting a remodel. It's not likely to happen anytime soon but it's on the horizon.

One detail I'm nuts about in bathrooms is the mixture of metal finishes. While I chose all brass for my tiny powder room refresh last year, I did mix chrome and black in the flip house hall bathroom and also in its master bathroom (to be revealed).

There's no rule that you have to mix metal finishes in bathrooms (or kitchens), but when you consider the examples below, you'll be thinking about it in your next bathroom makeover. For example, adding a touch of black to a collection of brass is a very good thing, so is mixing chrome and brass finishes.

To follow are examples of successful pairings and the analytical breakdown demonstrating the principle that mixing metal sheens in the bathroom can (and IMHO should) be done.

First, you can never go wrong with a medley of brass and black or nickel and black. Both work together beautifully. Notice the mixture of brass light fixtures and hardware with black mirrors. This is a no fail classic combination, regardless of the color of the vanity. One bathroom has brass faucets, the other has black ones that play off the black mirror. Both look amazing.

new darlings

little green notebook

Reverse the two, now make the mirror brass and opt for black pulls, fixtures, and faucet. Equally amazing combo.

mindy gayer

sfgirlbybay

You can also mix the silver tones found in chome/nickel with the warmer tones in brass. These two need not compete, they actually can complement each other. This medley works really well when one finish is shiny (the faucets) and the other finished is brushed (the sconces).

greige design

Shiny nickel faucets and sconces + matte brass framed mirrors.

studio mcgee

Again, shiny nickel faucets and matte brass hardware and sconces.

maison de pax

Copper and steel finishes together? Yep, no problem, notice the copper sconces are shiny the mirror's frame is a brushed finish. Lovely.

amber interiors

Copper and black? Fabulous! It's just as great a combination as brass and black.

design stuff

Black hardware is perfect for light or white cabinets, but not a good choice for black ones since the finish would disappear. On black or dark vanities, metallic tones pop against the dark background, but consider even when choosing gold or silver tones for the hardware, adding a black sconce above to play off the black cabinetry.

elle décor

jaclyn peters design

If you're committed to one finish with your mirrors and faucets, think about adding a different metal into the mix in just one spot. Like a piece of simple jewelry, the brass sconces in these bathrooms are the perfect polished detail. (Also note the brass strip in the shower, a nice touch).

via mattandkimrescue

studio mcgee

Why be limited to just two finishes when you can be bold and go for three. Live it up!

Notice how both of these bathrooms share nickel faucets and square brass mirrors, but the top bathroom has brass hardware and black finish sconces, whereas the bottom bathroom showcases black hardware and brass sconces. Nickel + brass + black, yes it works.

brandon architects

Again, same idea, you can mix three finishes but in this bathroom together with the chrome faucets live black mirrors and brass hardware.

crowell interiors

And again, see how the brushed nickel bathtub and sink faucets do pair with brass hardware & sconces, and black mirrors and shower frame.

sita montgomery interiors

The lesson: don't be afraid to mix your metal finishes in the bathroom; it makes the space more interesting and prevents the bathroom from feeling too matchy matchy.

What about you? How have you successful mixed metal finishes in your bathroom?

P.S. You may also like sleek single handle kitchen faucets and budget friendly brass lighting.

Metal Bathroom Faucets

Source: https://centsationalstyle.com/2018/04/mixing-metal-finishes-in-the-bathroom/

Share:
banner